Home
>
Mindpix Blog
Guide How to Setup Plugins from the ChatGPT Plugins Store
Sections
Healthcare
Automatisation
General writing
Marketing
Sales
Business management
Finance
Education
Knowledge base
AI assistance
Transport
Image generators
Interior design
3D Generators
AI Avatar
Website building
App development
Programming Languages
Gaming
Video generators
Music and Sound
Complete Simple 6 Steps
1. Access your OpenAI account
Visit the OpenAI website (https://openai.com/) and log in to your account using your credentials.
2. Navigate to the Settings section
Once you're logged in, navigate to the Settings section of your OpenAI account. You can usually find it in the account menu or user profile.
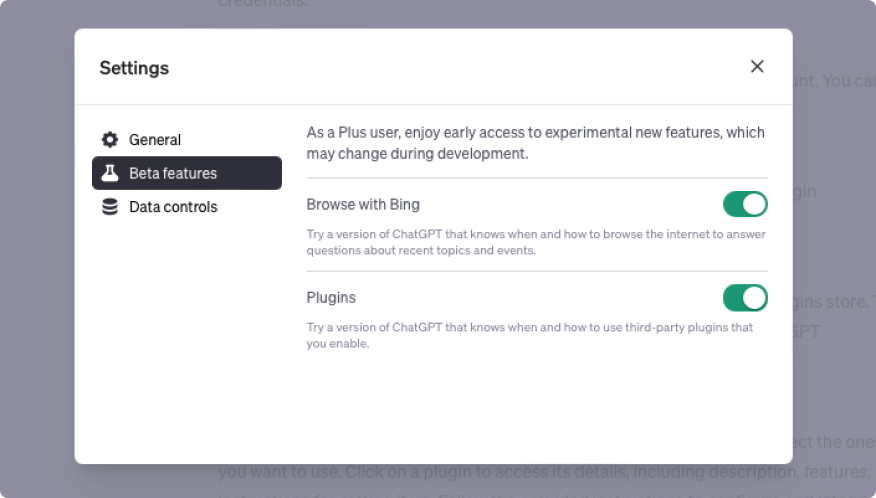
3. Open Beta features
Within the Settings section, locate and click on the "Beta" or "Experimental Features" tab. This tab allows you to access and enable early-release features and functionalities.
4. Activate the Plugins
Switcher In the Beta features tab, you should find an option called "Plugins switcher" or something similar. Enable or activate this switcher to enable plugin functionality in your account.

5. Browse the ChatGPT Plugins store
After activating the Plugins switcher, navigate to the ChatGPT Plugins store. You can often find a link or button within the Settings section or on the main OpenAI dashboard.
6. Choose and set up plugins In the ChatGPT Plugins store
Browse through the available plugins and select the ones you want to use. Click on a plugin to access its details, including description, features, and instructions for setting it up. Follow the provided instructions to configure and integrate the selected plugins with your ChatGPT sessions.

Note: The process of setting up each plugin may vary, depending on its specific requirements. Make sure to carefully follow the instructions provided by the plugin developers to ensure a successful setup.
That's it! You have now turned on plugins on your OpenAI account and set up plugins from the ChatGPT Plugins store. You can now enjoy the additional functionality and features offered by the integrated plugins in your ChatGPT sessions.
MindPlix is an innovative online hub for AI technology service providers, serving as a platform where AI professionals and newcomers to the field can connect and collaborate. Our mission is to empower individuals and businesses by leveraging the power of AI to automate and optimize processes, expand capabilities, and reduce costs associated with specialized professionals.
© 2024 Mindplix. All rights reserved.